Network and application monitoring using Zabbix
Contents
- Introduction
- Prerequisites
- Zabbix server installation
- Zabbix agent installation
Introduction
Zabbix is software that monitors numerous parameters of a network and the health and integrity of servers. Zabbix uses a flexible notification mechanism that allows users to configure e-mail based alerts for virtually any event. This allows a fast reaction to server problems. Zabbix offers excellent reporting and data visualisation features based on the stored data. This makes Zabbix ideal for capacity planning.
Zabbix supports both polling and trapping. All Zabbix reports and statistics, as well as configuration parameters, are accessed through a web-based frontend. A web-based frontend ensures that the status of your network and the health of your servers can be assessed from any location. Properly configured, Zabbix can play an important role in monitoring IT infrastructure. This is equally true for small organisations with a few servers and for large companies with a multitude of servers.
In the following, i will show you how to install Zabbix suite on Ubuntu.
Prerequisites
Network and application monitoring tool: Zabbix 3.2
OS: Ubuntu 17.04
Database: PostgreSQL 9.x
Zabbix server installation
Install repository configuration package
Install the repository configuration package, which contains apt (software package manager) configuration files:
shell> sudo wget http://repo.zabbix.com/zabbix/3.2/ubuntu/pool/main/z/zabbix-release/zabbix-release_3.2-1+trusty_all.deb
shell> sudo dpkg -i zabbix-release_3.2-1+trusty_all.deb
shell> sudo apt-get update
Install PostgreSQL
Install packages:
Create user (with password):
shell> sudo -u postgres psql
postgres#> createuser -P -s -e zabbix
Install server & frontend with PostgreSQL databaseInstall packages:
Install Ubuntu 17.04 php missing packages:
Create initial database:
psql> create database zabbix;
psql> \q
Then import initial schema and data:
Configure database for server:
shell> sudo nano /etc/zabbix/zabbix_server.conf
by modifying the following:
DBName=zabbix
DBUser=zabbix
DBPassword=<user_password>
Start server process:
shell> service zabbix-server start
Configure php for fronted:
shell> sudo nano /etc/zabbix/apache.conf
it's necessary to uncomment the "date.timezone":
php_value max_execution_time 300
php_value memory_limit 128M
php_value post_max_size 16M
php_value upload_max_filesize 2M
php_value max_input_time 300
php_value always_populate_raw_post_data -1
# php_value date.timezone Europe/Riga
Configure frontend
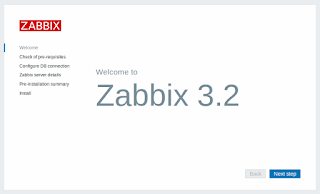
In your browser, open Zabbix URL: http://localhost/zabbix
Configure php for fronted:
shell> sudo nano /etc/zabbix/apache.conf
it's necessary to uncomment the "date.timezone":
php_value max_execution_time 300
php_value memory_limit 128M
php_value post_max_size 16M
php_value upload_max_filesize 2M
php_value max_input_time 300
php_value always_populate_raw_post_data -1
# php_value date.timezone Europe/Riga
As frontend configuration is done, you need to restart Apache web server:
shell> service apache2 restart
Configure frontend
In your browser, open Zabbix URL: http://localhost/zabbix

Follow the steps from:
to complete installation (when entering details for connecting to the database, make sure to select PostgreSQL database type).
Zabbix agent installation
Install agent:
shell> sudo apt-get install zabbix-agent
Configure agent (server details, etc.):
shell> sudo nano /etc/zabbix/zabbix_agentd.conf
Start agent:
shell> service zabbix-agent start
Enjoy (ง'̀-'́)ง

Comments
Post a Comment